Every Day is a Good Day to Remodel, and today is a wonderful day to start planning a kitchen that works beautifully for your household.
Ready to explore what your renovation could include? Book a free in-home estimate with A&G General Services USA by calling 407-572-1830.
A full kitchen renovation is more than a new look. It’s a carefully sequenced process that reshapes how your kitchen supports cooking, gathering, and the everyday rhythms of home. For Orlando homeowners, understanding what happens at each stage helps you make informed choices and enjoy a smoother journey from the first conversation to the final detail.
Here’s what a complete project can cover, and how A&G’s remodeling experts work with you to bring each part together.
Stage 1: Understand the kitchen you have, and the way you live
Before design decisions begin, we look closely at your existing kitchen. We consider the room’s dimensions, doors, windows, ceiling, flooring, storage, and the locations of plumbing and electrical connections. We also ask how you use the space.
Do several people cook together? Is the kitchen a gathering place for family and guests? Do you need more pantry storage, a better landing spot for groceries, or room for a coffee station? The answers help shape a plan around your routines, not just a beautiful photo.
This early conversation also sets expectations. We discuss your priorities, preferred materials, appliances, project sequence, and the decisions that need to be made before work begins. Our Orlando kitchen remodeling page offers a closer look at how a kitchen can combine personal style with everyday function.
Stage 2: Plan the layout, work zones, and movement
A kitchen should feel natural to move through. We map the cooking, cleaning, and food-preparation zones, then consider the spaces between them. The sink, dishwasher, refrigerator, range, pantry, and prep surfaces each have a role; their placement can make daily tasks feel more connected.
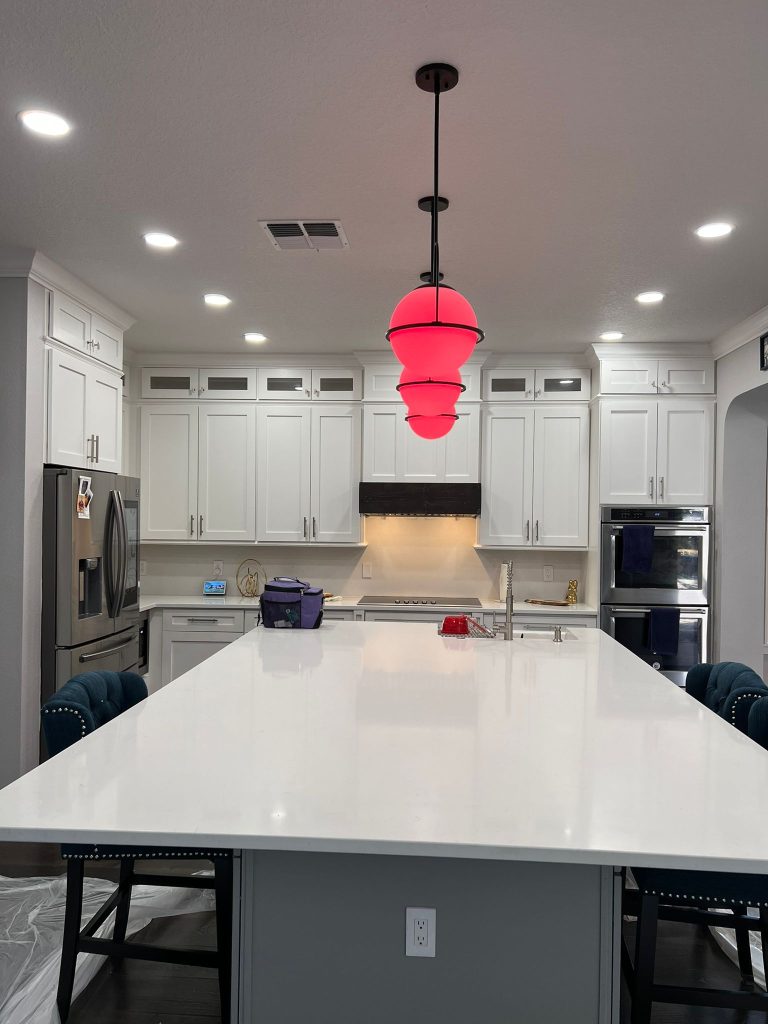
Landing areas matter, too. You need a convenient surface near the refrigerator for setting down groceries, beside the oven for hot dishes, and near the sink for washing and draining. If an island is part of the design, we consider how it supports prep, dining, or storage, and whether there is comfortable clearance around it for people, open drawers, and appliance doors.
Good layout planning is the quiet framework behind a kitchen that feels effortless. It also guides decisions about lighting, outlets, cabinets, and finishes before installation begins.
Stage 3: Prepare the space and complete demolition
Once the design and material selections are coordinated, the work area is protected and demolition begins. Depending on the project, this may involve removing old cabinets, countertops, backsplash, flooring, or selected wall and ceiling finishes.
Demolition reveals what a finished room can conceal. We look at the exposed surfaces and existing conditions so any necessary repairs can be addressed before new materials cover them. If the layout involves changes to plumbing, electrical, ventilation, or walls, the work is planned around the applicable requirements and inspections for your property.
This is also when the household can prepare for a temporary kitchen setup. Thinking ahead about daily meals and essentials can make the renovation period feel more manageable.
Stage 4: Coordinate the plumbing, electrical, lighting, and ventilation rough-in
With the room open, the behind-the-scenes systems can be installed or adjusted to suit the new plan. Plumbing work may include preparing connections for the sink, dishwasher, refrigerator, or other planned fixtures. Electrical work may address appliance needs, outlets, switches, and lighting locations. Ventilation planning considers the range hood and the route for its duct, where applicable.
This is the time to plan lighting as more than a single fixture. Ambient lighting brightens the room overall; task lighting helps illuminate work surfaces; and pendants or other fixtures can add a welcoming focal point. Getting the infrastructure in place before surfaces are closed makes it possible to coordinate those layers with cabinetry and the final layout.
Before any work is covered, we review the relevant installations and coordinate required inspections where applicable. Photographing concealed work and checking key connections helps keep important details visible and accounted for.
Stage 5: Choose the floor, and plan its place in the sequence
Flooring is a foundation decision, both visually and practically. It affects the feel of the whole room, the transitions to adjacent spaces, and the order in which cabinets are installed.
The right sequence depends on the flooring product and its installation requirements. Some flooring is installed before cabinets; some floating products need room to move and are installed after fixed cabinetry. We plan the sequence around the selected material and its manufacturer’s guidance rather than treating every floor the same.
In Central Florida, it’s also important to consider moisture exposure, cleaning needs, and the conditions in the home during installation. A well-planned flooring renovation in Orlando helps create a durable visual base for the rest of your kitchen.

Stage 6: Install custom cabinetry and bring storage into focus
Cabinetry is one of the defining elements of a kitchen: shaping its appearance, organization, and everyday usefulness. Before installation, the room is checked so cabinet placement aligns with the approved plan, appliance openings, and the flooring sequence.
Your storage plan can include a thoughtful mix of drawers, shelves, pantry space, and dedicated places for the things you reach for most. Custom kitchen cabinets in Orlando can be designed around your layout and preferences, helping make better use of corners, wall space, and the area around appliances.
During installation, precise alignment matters. We take care with leveling, spacing, fillers, panels, and the fit between cabinets and surrounding surfaces. These details help the finished room feel cohesive, and make it easier for countertops and backsplash materials to follow cleanly.

Stage 7: Add countertops and backsplash
Countertops are measured after the base cabinets are installed and checked. That way, the finished surface can be made to fit the actual cabinetry, including the planned sink and appliance openings. Once installed, the countertop becomes a key working surface and a visual bridge between cabinets, appliances, and walls.
The backsplash follows, protecting the wall around areas such as the sink and cooktop while adding color, texture, or pattern. We coordinate the material, layout, edges, and transitions with your overall design. The goal is a finish that looks considered and feels easy to care for.
Stage 8: Account for Central Florida’s warmth and humidity
Every kitchen encounters steam and cooking moisture. In Central Florida, it’s especially helpful to think about how ventilation and material choices work together. A suitable range hood, properly planned and installed for the project, helps manage cooking byproducts and moisture. The room also benefits from surfaces and finishes selected with everyday use and humidity in mind.
Cabinet edges, painted surfaces, backsplash joints, and areas beneath the sink deserve thoughtful attention. Good installation, appropriate products, and prompt attention to leaks all help protect the work. We can discuss material options that balance the look you want with the way your household uses the kitchen.
Stage 9: Finish walls and ceilings, then complete the details
Walls and ceilings bring the room together, but painting belongs near the end of the sequence. Completing major installation work first helps reduce the chance that fresh paint will be marked during cabinet, countertop, or fixture work. Once those surfaces are ready, careful preparation and finish coats create a clean backdrop for the cabinetry and lighting.
A&G offers interior painting in Orlando as part of its home transformation services. Where appropriate, we can also discuss material choices that support thoughtful building practices, such as durable finishes, low-emission products, or options that help reduce waste.
The finishing stage brings in hardware, faucets, lighting fixtures, switches, and appliances. These are the details your hands and eyes meet every day: the feel of a cabinet pull, the glow over a prep surface, the ease of using a faucet. In a modern kitchen remodeling Orlando homeowners love, each choice should contribute to a room that feels both refined and comfortable.

Stage 10: Review the work and prepare to enjoy your kitchen
Before the project is considered complete, we walk through the finished space with you. We check that cabinet doors and drawers operate as expected, fixtures are in place, appliances function, lighting works, and visible finishes are ready for your review. Required final inspections are coordinated where applicable, and any remaining items are identified and addressed.
Open communication is part of every stage. You should know what is coming next, what decisions need your input, and how the completed work is being reviewed. Our commitment to precise craftsmanship, quality, and integrity guides the process; our goal is to keep the work aligned with the agreed scope, schedule, and budget.
A full kitchen renovation transforms more than bare walls. It brings together movement, storage, light, materials, and the small daily moments that make a home yours. If your broader home remodeling plans include a bathroom, you can also explore our Orlando bathroom remodeling services.
Your kitchen’s journey can begin with a conversation. To talk through your ideas and arrange a complimentary in-home estimate, contact A&G General Services USA.
📞 407-572-1830 (FREE Estimate provided)
📲 Follow [@ag_general_services]
🌎anggeneralservicesusa@gmail.com
#kitchenmakeover #kitchenremodel #kitchengoals #homedesign #renovationexperts constructioncompany